In this article, we will learn how to add an admin panel without
entities in a Symfony 6.2 project using Sonata Admin 5.
Our project base will be to create a simple file upload
interface. But you could make any application. Including adding
simple text.
1. Installing Sonata Admin Bundle
If you haven't already installed Sonata Admin, you can do so with composer:
composer require sonata-project/admin-bundle
We invite you to browse our site to install Sonata Admin Bundle properly. here
2. Creating an Admin class
In your src/Admin folder, create a new file
UploadFileAdmin.php:
<?php
// src/Admin/UploadFileAdmin.php

namespace App\Admin;

use Sonata\AdminBundle\Admin\AbstractAdmin;
use Sonata\AdminBundle\Route\RouteCollectionInterface;

class UploadFileAdmin extends AbstractAdmin
{
    protected $baseRouteName = 'upload_file';
    protected $baseRoutePattern = 'upload-file';

    protected function configureRoutes(RouteCollectionInterface $collection): void
    {
        $collection
            ->remove('create')
            ->remove('delete')
            ->remove('edit')
            ->remove('export')
            ->remove('list')
            ->remove('batch')
            ->remove('show')
            ->add('upload');
    }
}
In this class, we have removed all default CRUD actions of Sonata
Admin and added a new upload action.
3. Creating an Admin Controller
In the src/Controller/Admin folder, create a new file
UploadFileController.php:
<?php
// src/Admin/UploadFileController.php

namespace App\Admin;

use Sonata\AdminBundle\Controller\CRUDController;
use Symfony\Component\HttpFoundation\Response;

class UploadFileController extends CRUDController
{
    public function uploadAction()
    {

        return $this->renderWithExtraParams('admin/upload.html.twig', [
            'title'=> 'Upload de fichier excell'
        ]

        );
    }
}
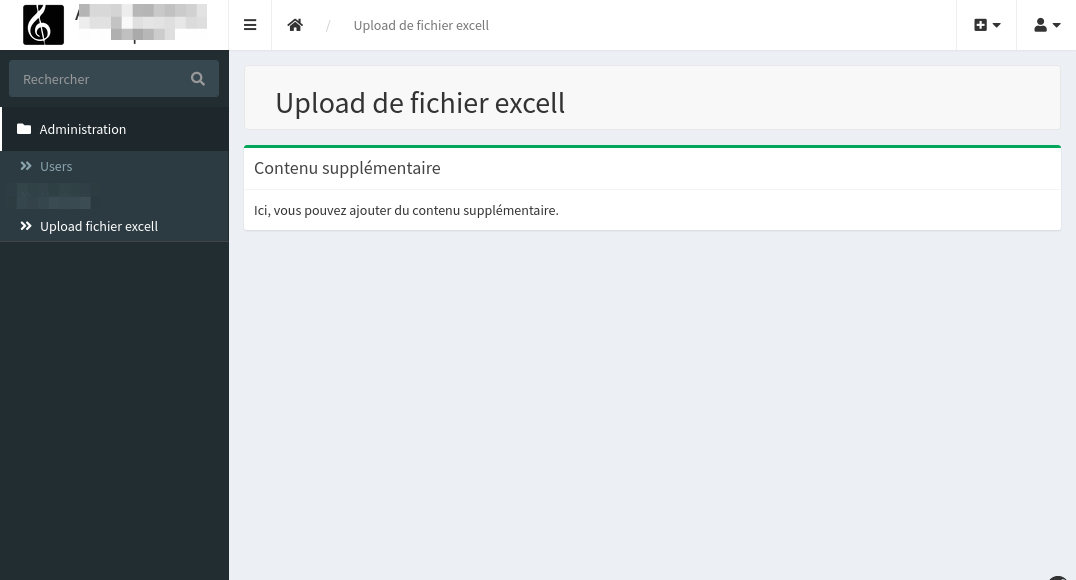
In this controller, we have defined an upload action
that displays an upload.html.twig view.
4. Creating a template for the upload action
Create a new file templates/admin/upload.html.twig:
{# templates/admin/upload.html.twig #}

{% extends '@SonataAdmin/standard_layout.html.twig' %}

{% block title %} - {{ title }}{% endblock %}

{% block breadcrumb %}
    <li><a href="/admin/dashboard"><i class="fa fa-home"></i></a></li>
    <li class="active"><span>{{ title }}</span></li>
{% endblock %}

{% block sonata_page_title %}
    <h2 class="sonata-page-title">
        {{ title }}
    </h2>
{% endblock %}

{% block sonata_page_content %}
    <section class="content">
        <div class="box box-success">
            <div class="box-header with-border">
                <h3 class="box-title">Contenu supplémentaire</h3>
            </div>
            <div class="box-body">
                Ici, vous pouvez ajouter du contenu supplémentaire.
            </div>
        </div>
    </section>
{% endblock %}
5. Declaring the Admin service
In the config/services.yaml file, add the declaration of your admin service :
services:
    app.admin.upload_file:
        class: App\Admin\UploadFileAdmin
        arguments: [~, Symfony\Component\HttpFoundation\File\File, App\Admin\UploadFileController]
        tags:
            - { name: sonata.admin, manager_type: orm, group: "Contenu", label: "Upload fichier excell" }
Note that in the arguments, we use Symfony\Component\HttpFoundation\File\File as a placeholder for the entity. Since we are not using an entity, it does not matter.
6. Configuring Sonata Admin
Finally, we will add our new admin to the Sonata Admin dashboard. Edit the config/packages/sonata_admin.yaml file:
sonata_admin:
    dashboard:
        groups:
            uploads:
                label: Uploads
                icon: '<i class="fa fa-upload"></i>'
                items:
                    - route: upload_file_upload
                      label: "Upload fichier excell"
7. Adding a custom action to your dashboard
Edit your UploadFileAdmin class to include the configureDashboardActions method:
// src/Admin/UploadFileAdmin.php

// ...

class UploadFileAdmin extends AbstractAdmin
{
    // ...

    protected function configureDashboardActions(array $actions): array
    {
        $actions['upload'] = [
            'template' => 'admin/dashboard_upload_action.html.twig',
            'label'    => 'Chargement des fichiers',
            'icon'     => 'fa-upload',
            'route'    => 'upload'
        ];

        return $actions;
    }
}
In this method, we have added a custom upload action to our dashboard.
8. Creating the template for the custom action
Create a new file templates/admin/dashboard_upload_action.html.twig :
<a class="btn btn-link btn-flat" href="{{ admin.generateUrl(action.route) }}">
    <i class="fas {{ action.icon | default('')}}"></i>
    {{ action.label | default('') | trans({}, 'default') }}
</a>
This template will be used to display the custom action button on the dashboard.

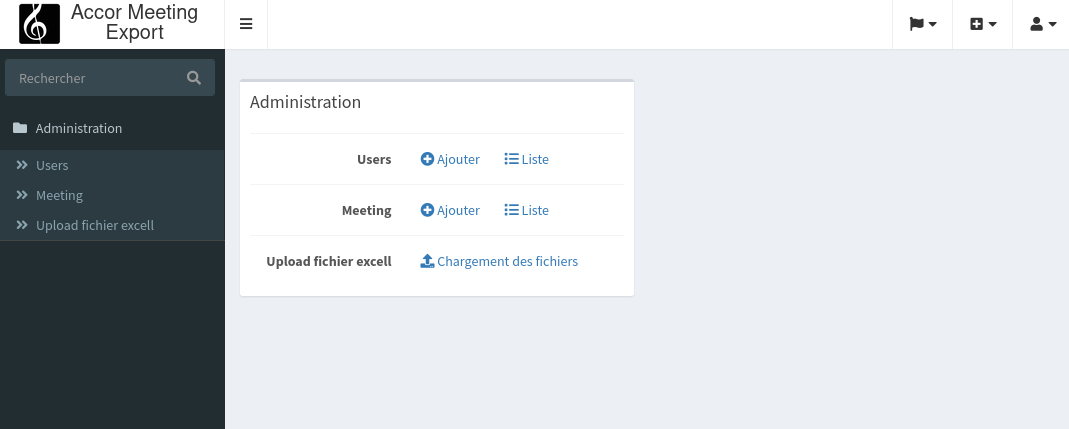
Now, when you navigate to /admin/dashboard, you should
see a new "File Upload" button on your dashboard. By clicking on
this button, you should be redirected to your upload page.

And there you have it! You have successfully created an admin panel without entities in Sonata Admin. This can be very useful for adding custom features to your admin panel.